Carpet Removal Cost in London- Everything You Need to Know

Carpet removal process with professional removal company

Useful Information About Carpet Removal Process- Cost Considerations Before Removing Your Old Carpet

If you’re looking to upgrade your flooring, one of the first steps is removing your old carpet. Whether you’ve got a well-trodden carpet, a decorative rug that’s outlived its style, or underlay that’s seen better days, efficient carpet removal is an important task. In this comprehensive blog post, we’ll walk you through the cost of carpet removal (starting from £6 per m²), outline the best step-by-step process, and share useful tips on carpet disposal and recycling. We’ll also discuss why hiring a qualified professional can often be the best route for many homeowners. Let’s dive in!

1. Why Remove Your Old Carpet?

  1. Aesthetic Upgrade
    Over time, colors fade, patterns go out of style, and stains build up. Removing an old carpet can instantly modernize your space.
  2. Health Reasons
    Carpets can harbor dust, allergens, and even mildew, affecting indoor air quality.
  3. New Floor Installation
    If you plan to install hardwood, laminate, vinyl, or fresh carpeting, the old flooring must go.
  4. Sudden Flooding or Water Damage
    Accidents happen—whether it’s a burst pipe, an appliance leak, or a natural flood. A wet carpet can become a breeding ground for mold and mildew if not removed promptly. Urgent removal is crucial to prevent permanent damage to the subfloor and potential health hazards. In these high-stress situations, professional help can make the process faster, safer, and far less overwhelming.

2. Understanding Carpet Removal Costs

Pricing Basics

  • Prices start from £6 per m²: This is a ballpark figure and can go up depending on factors like the condition of the carpet, size of the space, and complexities (e.g., heavily glued carpets or multiple layers of underlay).
  • Size and Complexity: Larger areas or rooms with lots of nooks and crannies may add to the cost.
  • Additional Services: Removal of carpets, rugs, underlay, tack boards, and adhesives can increase the price if they require extra labor and time.

Factors That Affect Pricing

  1. Carpet Condition: Worn, wet, or heavily stained carpets can be more cumbersome to remove, especially if moisture has seeped into the underlay.
  2. Type of Underlay and Boards: Some underlays are stapled or glued to the subfloor or boards, requiring specialized tools or extra time to remove.
  3. Accessibility: If your home has lots of narrow staircases, or if furniture must be moved, labor costs may rise.
  4. Disposal Fees: Transporting and disposing of the old carpet, rug, and underlay can incur additional expenses, especially if you aim to recycle certain materials.

By discussing these variables with professionals or comparing quotes, you can get a clearer sense of your total budget.

3. The Best Step-by-Step Carpet Removal Process, Should You Consider DIY

With proper preparation and the right techniques, you can save time, effort, and money.

Step 1: Preparation

  • Clear the Area: Remove all furniture, breakable items, and décor. A clear space ensures you won’t have to stop mid-removal to move belongings around.
  • Safety First: Gather personal protective equipment (PPE) like gloves, dust masks, and knee pads. Carpets collect dust and allergens that can become airborne once you start pulling them up.

Step 2: Identify Fastening Points

  • Remove Baseboards or Threshold Strips: In some cases, you’ll need to gently pry these up. If you plan to reuse the baseboards, remove them carefully to avoid damage.
  • Check for Tack Strips (Gripper Rods): These are typically located around the perimeter of the room. They hold the carpet in place.

Step 3: Cutting the Carpet

  • Cut into Manageable Strips: Use a utility knife to cut the carpet into 3- to 4-foot strips. Smaller strips are easier to handle, roll, and transport.
  • Roll and Secure: As you peel back each section, roll it up tightly and secure it with tape to keep everything neat.

Step 4: Removing the Underlay

  • Peel Away Carefully: Depending on the type of underlay, it might be stapled or glued to the subfloor or boards. Remove it gently to prevent damage to the subfloor.
  • Check for Additional Layers: Sometimes, older floors might have more than one layer of underlay. This can increase removal time.

Step 5: Tack Strips & Staples

  • Remove Tack Strips (Gripper Rods): Use a pry bar or similar tool. Be mindful of sharp nails or tacks.
  • Pull Out Staples: A sturdy pair of pliers or a specialized staple-remover tool helps you extract leftover staples or nails.

Step 6: Inspect the Subfloor or Boards

  • Ensure It’s Level and Secure: Look for signs of rot, damage, or uneven boards. Repair or replace any damaged areas.
  • Clean Thoroughly: Sweep or vacuum the subfloor to remove debris, dust, and any stray staples or nails.

Step 7: Disposal & Recycling

Now that your carpet, rug, underlay, and boards are removed, it’s time to think about disposal. You could:

  • Hire a Professional Disposal Service: If you’re short on time or the volume is large, let a professional handle the disposal.
  • Take It to a Recycling Center: Some recycling centers accept carpets and underlays, ensuring materials don’t end up in a landfill unnecessarily.
  • Check Local Council Options: Many local councils in the UK offer collection or provide information on recycling facilities that handle carpets.

4. Why Consider Professional Carpet Removal Services?

While a small room of carpet might seem easy enough to remove on your own—and you might be able to transport the old carpet to a recycling or disposal site using your personal car—larger jobs and urgent situations (such as sudden flooding) quickly become more complicated. Here’s where qualified carpet removal companies step in:

  1. Expertise & Efficiency
    • Professionals have the tools, training, and hands-on experience to remove carpets, rugs, underlay, and boards quickly and safely.
    • They know how to handle tricky spots (like glued-down underlay or awkward corners) without damaging the subfloor.
  1. Convenient Disposal
    • Disposing of leftover carpet and underlay is one of the biggest headaches for DIY projects. Small quantities can fit in a car, but if you’re tackling multiple rooms or a large area, you’ll likely need a van or special arrangements.
    • Carpet removal companies often include disposal or recycling fees in their total price. This can be more cost-effective than hiring a separate service or renting a vehicle to haul away large volumes of material.
  1. Time & Effort Savings
    • DIY removal can be a lengthy process, particularly if you run into unexpected issues like stubborn gripper rods or multiple layers of underlay.
    • Professionals can minimize disruption to your home life and complete the job in a fraction of the time it might take a novice.
  1. Handling Emergencies (Flooding or Water Damage)
    • When your carpet is drenched due to flooding or a burst pipe, time is of the essence to prevent mold and further property damage.
    • Professionals can handle urgent removals swiftly, ensuring the subfloor is dried properly and any compromised materials are disposed of or recycled. Their experience prevents potentially costly mistakes or oversights.
  1. Cost Benefits
    • While there is a fee for professional carpet removal, some companies don’t charge much for this service and even bundle it into the overall package if you’re having new flooring installed.
    • This integrated pricing can save you money on disposal costs, tool rental, and the potential for damage or errors if you go the DIY route.

5. Carpet Disposal and Recycling

Sustainability is increasingly important. Recycling or responsibly disposing of old carpet reduces environmental impact and keeps unnecessary waste out of landfills. Here are a few ways to handle it:

  1. Carpet Recycling Centers
    Some specialized facilities convert used carpet fibers into new products like insulation or plastic pellets.
  2. Charitable Donations
    If the carpet or rug is still in decent condition, certain charities or re-use organizations might accept it.
  3. Upcycling Projects
    Cut portions of carpet can be repurposed into car mats, pet beds, or protective mats for gardening.

6. Tips for a Smooth Carpet Removal Experience

  • Get Multiple Quotes: Since prices can start at £6 per m² but vary based on complexity, compare a few options to find the best value for money.
  • Plan Ahead: Schedule carpet removal when you can dedicate time to the task. Rushing can lead to injuries or mistakes.
  • Check for Hidden Surprises: Sometimes you might find old floorboards, layers of underlay, or damage that needs attention. Budget a little extra for unexpected repairs.
  • Communicate with Installers: If you’re hiring a separate company for new floor installation, coordinate timing and expectations to avoid delays.

7. Final Thoughts

Carpet removal might seem like a straightforward DIY project—especially for a small room—but when you factor in disposal, transportation, flooding emergencies, and potential surprises, bringing in a qualified professional can be a smart and cost-effective choice. They handle the heavy lifting, ensure efficient disposal or recycling, and often include these services as part of the overall flooring package. With a starting cost of around £6 per m², it’s an investment in your home’s appearance, health, and long-term value.

Removing Decking Without the Hassle- All Junk Removal’s Guide

Removing old, rotted deck boards

The difficult job of removing old, rotted deck boards doesn’t have to be a back-breaking, time-consuming project. This comprehensive guide will show you how to transform what could be a two-hour ordeal into a quick 15–20 minute task (depending on the size of your deck). From preparation and must-have tools to efficient teardown tactics and responsible disposal, you’ll find everything you need to know here. For even more tips, be sure to check out resources like The Family Handyman, This Old House, Decks.com, and The Spruce.

1. Assess the Deck’s Overall Condition

Before you lift a single board, conduct a thorough inspection:

  • Check for Rot: Examine the decking surface, joists, and ledger boards for soft spots or discoloration.
  • Identify Fastener Types: Determine whether your boards are nailed, screwed in, or secured with hidden fasteners. This will affect the way you remove them.
  • Decking Material: Is your deck made of pressure-treated wood, cedar, redwood, or composite? Composite decks often have hidden fasteners, which can make removal easier in some cases.

2. The Secret to Turning a 2-Hour Job into 15–20 Minutes

Use the Right Tools and Approach: Many homeowners try to strip old boards with a standard pry bar, claw hammer, or low-quality tools, then spend hours wrestling with rusted screws and stubborn nails. The key to fast and easy deck removal is having the right gear:

  • A Long, Sturdy Pry Bar: A 36-inch (or similarly long) pry bar provides more leverage, reducing strain on your back and arms.
  • A Circular Saw: Cut boards into small segments between the joists (typically spaced 16 inches apart), making them easier to lift off.
  • An Angle Grinder or Cut-Off Wheel: Perfect for dealing with nails or screws that refuse to budge.
  • Proper Safety Equipment: Gloves, safety glasses, ear protection, and a dust mask are essential.

3. Worksite Preparation

  1. Clear the Deck Surface: Move all furniture, potted plants, and décor off the deck.
  2. Protect Surrounding Areas: Use drop cloths or plywood sheets to shield nearby landscaping, siding, or windows from flying debris.
  3. Plan for Debris Disposal: You can rent a small dumpster, schedule a bulk pick-up, or designate a specific disposal area. This saves time once demolition is complete.

4. Safe and Efficient Deck Board Removal

4.1 For Boards Fastened with Nails or Screws

  • Short Segments = Easy Removal: Cut the deck boards into 2–3 foot sections. This relieves tension, letting you lift each segment easily with a long pry bar.
  • Stubborn Screw Heads: If they’re corroded or stripped, don’t waste time fighting them. Cut around the screws, remove the board sections, and grind off the screw heads later.

4.2 For Composite Boards with Hidden Fasteners

  • Hidden Clips: Usually plastic or stainless steel components that hold the boards in place.
  • Simple Extraction: Remove the stainless screws holding the clips with a power drill or impact driver. Once the clips are gone, composite boards typically lift out effortlessly.

5. Inspect and Repair the Substructure

With the deck boards removed, examine the underlying frame:

  • Check for Rot: Use a screwdriver or awl to probe joists for soft, spongy areas.
  • Look at Hardware: Joist hangers and other metal connectors might be rusted or loose. Replace any compromised parts.
  • Ventilation: If you previously had moisture issues, consider how to improve airflow—e.g., leaving proper gaps between new boards and avoiding enclosed sides.

6. Debris Removal and Cleanup

  • Collect and Separate: Gather offcuts, sawdust, nails, and screws. In many areas, pressure-treated wood must be disposed of separately.
  • Dumpster or Pickup: If you have a large amount of debris, renting a dumpster or using a pickup truck can streamline disposal.
  • Repurpose or Recycle: If any boards are in decent shape, you could donate them to a local reuse center or repurpose them for a smaller project (like a raised garden bed).

7. Pro Tips to Save Time and Stay Safe

  1. Leverage Is Your Friend: A longer pry bar reduces back and shoulder strain.
  2. Segment the Boards: Cutting boards into shorter lengths makes prying them up far easier.
  3. Work Methodically: It can be more efficient to make all your cuts first, then lift the sections in one go.
  4. Always Use PPE: When operating saws and grinders, wear gloves, safety glasses, and hearing protection.
  5. Know When to Call a Pro: If you find major structural damage or feel uneasy working on an elevated deck, consult a professional. All Junk Removal has professional teams, that can safely provide decking removal and same your efforts, should you choose this way.

8. Moving Forward: Planning Your New Space

With the old boards gone, it’s time to reimagine your outdoor area:

  • Replace with New Decking: Natural woods, composites, and PVC each have their own advantages. Consider maintenance needs, aesthetics, and budget.
  • Deck Frame Upgrades: Reinforce joists, add flashing tape for moisture protection, and ensure the ledger board is securely fastened to your home.
  • Alternative Outdoor Structures: Instead of a new deck, you might build a patio, screened porch, or another backyard feature that suits your lifestyle.

Final Thoughts

Removing an old deck doesn’t need to be a tedious, day-long affair. With the right tools—like a long, sturdy pry bar and a circular saw to cut boards into manageable sections—you can reduce labor time from hours to mere minutes. Remember to prioritize safety and proper disposal, and once the deck boards are gone, you’ll have a fresh canvas to create the outdoor living space of your dreams.

Do you have other deck removal tips? Share your experiences in the comments below! This is just one example of how a teardown can be quick, safe, and even fun, leaving you plenty of time to build the deck or outdoor oasis you’ve always wanted.

Kitchen Removal Cost in London- What Do We Need to Know

Replacing kitchen units and appliances

What Do We Need to Know Before We Replace Our Kitchen? A Comprehensive Guide

Replacing your kitchen is one of the most rewarding home improvement projects you can undertake. Yet, it can also become one of the most complex and expensive if you’re unprepared. Better understanding the kitchen replacement expenses will save you money and make your experience much more hassle-free.

The very first thing to consider when deciding to fit a new kitchen is all the costs involved—from the price of new cabinets and appliances to the labor of installation. And crucially, don’t forget about removing the old kitchen. Below, we’ll break down what you need to know before diving in.

1. Planning the Project and Setting a Budget

Before starting any renovation, map out your overall budget. Typical kitchen refurbishment costs can be grouped into:

  • New Kitchen Units and Worktops
    Prices vary widely depending on whether you go for off-the-shelf or custom-built units, and whether you choose laminates, quartz, or granite worktops.
  • Appliances
    If you plan to upgrade your oven, fridge, dishwasher, and other appliances, don’t forget to include these costs in your budget.
  • Installation Services
    Proper installation often requires professionals who can handle carpentry, plumbing, and electrical work safely and accurately.
  • Old Kitchen Removal
    This step is sometimes overlooked. However, getting rid of your old cabinets, worktops, and appliances can add a significant amount to your overall expenses.

2. Why Kitchen Removal Costs Matter

It’s easy to get wrapped up in the excitement of choosing shiny new appliances and elegant countertops. Yet, kitchen removal is a critical part of the process and can be surprisingly costly. Here’s why it matters:

  • Safety
    Old cabinets and countertops may need careful dismantling to prevent damage to walls, floors, or surrounding fixtures.
  • Compliance
    Different materials—such as electrical parts, metals, and treated wood—can have specific disposal requirements.
  • Convenience
    Professional removal saves you from the heavy lifting, transportation headaches, and time-consuming trips to the local waste facility.

3. Example Removal Costs

To give you a rough guide, here are some example removal costs . Actual quotes will vary by location, kitchen size, and specific company rates:

  1. Small Kitchen Removal
    • Starting from £250
      This typically covers dismantling a small run of units, a sink, and minor appliances.
  1. Medium Kitchen Removal
    • Around £380
      A medium-sized kitchen often includes more cabinets, a couple of appliances, and possibly a larger or L-shaped worktop.
  1. Large Kitchen Removal
    • Starting from £580
      Larger kitchens may have extensive cabinetry, heavier appliances such as double-door fridges, and wide or multiple worktops.

Note: These figures are for demonstration purposes only. Individual circumstances—such as kitchen condition, access difficulties, and regional factors—can cause prices to vary.

4. What Influences Removal Costs?

  1. Size of the Kitchen
    More cabinets, large appliances, and extensive worktops naturally lead to higher removal costs.
  2. Kitchen Tiles Removal
    If you’re also taking out wall or floor tiles, be aware this can add both labor time and disposal fees.
  3. Accessibility
    Kitchens situated on upper floors without lifts, or properties with narrow doorways and hallways, can increase labor time and cost.
  4. Additional Disposal Fees
    Certain items like old sinks, refrigerators with coolant, or hazardous materials may incur extra disposal charges.
  5. Time and Labor
    If the removal team needs more time to carefully dismantle or safely transport items, you’ll see that reflected in the cost.

5. Additional Considerations Before Installing Your New Kitchen

  1. Design and Layout
    Are you keeping the current layout or planning a complete redesign? Major changes could mean new plumbing and electrical pathways, which add to both cost and timeline.
  2. Electrical and Plumbing Checks
    Make sure existing wiring and plumbing are adequate for your new setup. Outdated systems may need upgrading to meet modern standards.
  3. Storage and Organization
    This renovation is the perfect time to address your storage needs. Consider pull-out drawers, corner carousels, and pantry solutions that fit your lifestyle.
  4. Materials and Finishes
    If you cook often, prioritize durable, easy-to-clean surfaces. Think carefully about the lifespan and maintenance of each material before making your final choice.
  5. Timeline
    Renovations can take longer than expected due to unexpected setbacks. Keep a backup plan for meal prep, and try to have a realistic buffer in your schedule.

6. Hiring Professionals vs. DIY

While some homeowners choose a DIY approach to remove their old kitchen in hopes of saving money, it’s not always the best route. Professional removal services:

  • Ensure Compliance with local waste disposal regulations.
  • Save Time and Effort on heavy lifting and specialized tasks.
  • Reduce Risk of damage to your home or injury to yourself.

If you’re unsure, professional kitchen removal companies—such as London Rubbish Removal, Snappy Rubbish Removals, or Express Waste Removals—have experience handling various kitchen sizes and materials, often making the process faster and more efficient.

7. Final Tips

  1. Get Multiple Quotes
    Don’t settle on the first quote you receive, whether for removal or installation. Comparing prices ensures you get the best value for your budget.
  2. Consider Recycling or Donation
    If parts of your old kitchen (cabinets, countertops, appliances) are still in good condition, some charities or recycling centers might accept them. This can reduce disposal costs and help the environment.
  3. Check for Hidden Costs
    Ask about any extra fees—such as congestion charges, parking permits, or out-of-hours labor—so you’re not blindsided.

Conclusion

When planning a kitchen renovation, old kitchen removal should be high on your list of considerations—right alongside new cabinets, worktops, and appliances. By understanding the factors that affect removal costs and planning accordingly, you’ll be set up for a smoother transition to your dream kitchen.

Remember, the cost examples provided are just that—examples. Obtain detailed quotes based on your home’s unique features and needs. With thoughtful budgeting, informed decisions, and the help of qualified professionals, you’ll soon enjoy a beautiful new kitchen that meets both your aesthetic and practical needs for years to come.

How to Clear Garden Waste Easily?

How to clear garden wastes easily

Clearing garden waste can be a tiresome task, but with the right tools and strategies, it can be easy and efficient. In this blog, we’ll discuss the different tools that are essential for clearing garden waste effectively. We’ll also discuss the benefits of clearing garden waste and provide a checklist that will help you get started. So read on to learn how to clear garden waste easily!

How to Clear Garden Waste Easily?

Tools for effective waste clearance

Gardening is a fun and rewarding activity, but it can also be time-consuming and messy. To make things easier, you need to know how to clear garden waste effectively. There are a variety of tools available for this purpose, so make sure to choose the right one for the job. For example, when clearing tree debris, use a pile driver to break it down into smaller pieces.

When cleaning up leaves, use a leaf rake to remove them in one go. Remember to read and follow all instructions before using the tool, as incorrect use could result in injury or worse. When clearing garden waste, be safe and avoid contact with dangerous chemicals; they could damage your skin!

How to Clear Garden Waste - Tools for effective waste clearance

Benefits of clearing garden wastes

Garden waste clearance is an important part of keeping your garden looking its best. By following the tips in this article, you’ll be able to easily clear garden waste without any stress or hassle. One option is to choose the right waste-clearing tool for the job. There are a variety of options available, from composters and composters-cum-tippers to wheelbarrows and hoes. I

t’s important to choose the right tool for the situation, as each one has its own benefits. For example, composters-cum-tippers help to control pests and clean up debris, while wheelbarrows help to move waste easily and reduce maintenance work. By following these tips, you’ll be able to easily clear garden waste and improve the appearance of your garden in the process!

Tips for clearing garden wastes

Clearing garden waste can be a tedious but rewarding job.

Tips for clearing garden wastes Here are a few tips that will help make the process easier:

1. Make a list of what needs to be cleaned up.

2. Be patient and take your time when cleaning, as this job can be tedious but overall very rewarding!

3. Use equipment that is safe for working with garden waste – a skid loader would work great!

4. Clear the area where the waste will be deposited first.

Conclusion

Clearing garden waste is an important task that can help improve your garden’s appearance and health. By following the checklist provided, you will be able to successfully clear waste from your garden without any harmful effects. So, what are you waiting for? Start clearing garden waste today and enjoy the benefits!

How All Junk Removal Help With Decluttering Home Office Effectively?

All Junk Removal Decluttering Home Office

Professional junk removal services help an individual in decluttering home office. Many removal services in London such as All Junk Removal have made it their mission to handle waste material with care for both the customer and their environment.

This especially applies to e-waste recycling, and the company offers various options for getting rid of unwanted electronic items, which are according to WEE recycling standards in the UK.

How All Junk Removal Help With Decluttering Home Office Effectively?

  1. Truck Hauling

The All Junk Removal Company will arrive at the location with a dumpster fitted in the back. The workers will collect all the junk and put it into the truck’s dumpster. This option is considered to be the best for post-cleanup after a building renovation as all the unwanted items will be piled up in advance and sorted and recycled later by the rubbish collection service.

  1. Dumpster Rental

Here individuals will be provided with a dumpster of their choice by the Junk Removal Company. The individuals can fill this dumpster at their own will and when it is done, the company will take the dumpster with them. This is the best option if an individual wants to clean up the space over a period of days in their own time.

Home Office Setup

How A Rubbish Removal Company Recycles your Home Office E-Waste?


The recent pandemic has led to many having to work from home, and cluttering has now increased more than ever. Many had to quickly set up a home office for an indefinite amount of time which they were not really prepared for. To declutter the home office to have a smart home with enough workspace, office junk removal services are an effective option to consider, especially when it comes to e-waste removal and disposal.

  1. Smartphones And Other Electronic Devices

Smartphones and other electronic devices within the home office can be recycled professionally by the electronic waste disposal company if they find them in a good condition. The company ensures that they are returned to the respective companies where these gadgets came from or where they can be remodeled to be used by another customer or for resale. It should be noted that these smart devices do have hazardous fluids within them. Therefore, they should be double-checked before being given away, but the All Junk Removal experts can take care of that.

  1. Ink Cartridges

Buying refillable ink cartridges instead of new cartridges every time the printer runs out of ink can be of great help in reducing home office clutter. And another creative DIY idea is to recycle floppy disks by converting them into pen holders instead. If all this is too hectic for someone, then they can easily hire a rubbish removal company to convert and recycle these gadgets for them.

  1. Computers And Laptops

Computers and laptops are recycled by rubbish removal companies that collect these from one’s house and take them to AATP (Approved Authorized Treatment Facilities), where all these devices undergo a data destruction process before they are sent for reuse or recycling. There are laws within the U.K that let one track exactly where their desktop device has gone and what processes it is undergoing. And as a customer, one of the first things before disposing of any digital device is to back up all the files necessary and remove any confidential information that might endanger the customer.

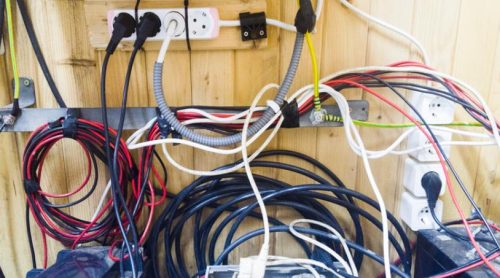
  1. Electric Wires And Cables

Electric Wires And CablesOne of the most recycled items amongst all other home office e-waste is electric wires and cables. Often, one gets the wrong cables for their electronics and then these cables remain unused and untouched. But if one hires a rubbish removal company, then they will be able to not only categorize these e-wastes within organized sections, but they will be able to recycle these cables by either reselling them or giving them away to charity.  In this way, e-waste can be prevented from going to landfills and instead can be given to someone in need of these items.


  1. Office Furniture

Office furniture can be upcycled to be converted into more productive products. For example, one can upcycle office furniture such as a study desk and convert it into a shoe rack instead. Or the rubbish removal service can simply take these products to companies such as IKEA or Etsy or charities where they can be resold to other customers/users if they are still in good condition.

Conclusion

Decluttering home office is easy if you reach out to All Junk Removals. There are indeed many ways to declutter one’s home office and remove e-waste safely and environmentally friendly.  If one does not want the headache of sorting through the mess and figuring out how to upcycle or recycle most of the e-waste items, it is best to contact professional all junk removal services that deal with WEEE items and old furniture daily and follow all UK government guidance.

4 Top Cheap DIY Home Upgrades for Home Improvements

DIY to renovate house

Everybody has tried at least DIY home upgrades on their home and wants to transform it into their dream abode or possibly make a few upgrades to a certain extent, yet that is frequently more difficult than one might expect.

Regardless of whether you’re upgrading your space or outfitting to sell, renovating your house is a chief endeavor and monetary decision. Try not to burn up all available resources to redesign your home.

With a small amount of money and some perspiration value, it’s feasible to tidy up a home’s appeal while additionally making the interior snappier and more engaging.

Below mentioned are the top four budget-friendly ideas to transform your outdated household items that may end up as household waste into beautiful interior design additions to improve the overall look of your home.

4 Top Cheap DIY Home Upgrades for Home Improvements

1. Add additional Storage Space

Transform your spare room into a usable room by adding a few cheap shelves or hooks to store your garments, shoes, and any other items you require additional space for. Reusing and repurposing old furniture or household waste before calling all junk removal for professional furniture removal can add charm to your home. Adding a mirror makes a room look bigger while providing you with the opportunity to double-check your look before going out.

2. Get Rid of the Popcorn Ceiling

Do you loathe the appearance of your popcorn ceilings? In addition to the fact that they are unattractive, they are unsanitary — a landing cushion for residue, soil, and spider webs. Fortunately, they can effortlessly be taken out with the assistance of a wet/dry vac and a drywall blade.

DIY Home Upgrades - Get Rid of the Popcorn Ceiling

When scratching popcorn roofs, you will need to use a utility blade or a drywall blade to work on the surface and make a smooth surface. You will likely have to skim it with a meager layer of joint compound to streamline blemishes, then sand it smooth before repainting it. Make sure to get the ceilings tested for asbestos before you attempt this one yourself—a few homes constructed before the 1970s may contain it and it requires responsible building waste disposal.

3. Reuse Old Items Outdoors

Discovering a spot for everything is sometimes the most strenuous part of keeping a home look amazing and clean. Visible storage is not just useful inside a home, but also outside in the garden or garage. A couple of extra shelves made from wooden pellets for example can offer more storage options. You can often utilize certain waste items in good shape to reuse them. Such affordable and creative customizable arrangements are an appealing method to score some extra room in a dull-looking area with your unique designs. A spot to show books, photographs, or art, floating shelves look impressive.

4. Paint Unattractive Tiles

Concealing the tiles under a floor covering isn’t always cool. Redesigning is additionally off the table if you live in a rental or do not have the financial budget to tear out appalling tiling. So, to upgrade the space, you can paint the floor in a checked pattern, with beige and white color to build contrast with the walls. If you prefer not to completely substitute any tiled floors, you can paint them in this way for a new and clean look.

Paint Unattractive TilesStenciling is another extraordinary method to paint to change the vibe of your floor. The type of painting is the same, with the additional stenciling step. However, the additional effort is truly a game-changer. It is one of the modest and easy DIY projects to upgrade your home.

Conclusion

These are some of the best ways to turn your dull-looking house into a completely fresh one for very little money. You can always use these ideas without worrying about the spending plan as these are super budget-friendly ideas to upgrade your home.

How To Do House Clearance And Cleaning?

House clearance and cleaning

A house clearance is often needed when a family is bereaved, or when a friend or family member is taken into care. When this happens, the house needs to be cleared to be sold or given back to the community. House cleaning can be quite a difficult, demanding and emotionally draining undertaking, but it shouldn’t be. You should do a proper house clearance preparation to make the process easier and faster.

How To Do House Clearance And Cleaning?

1. Scheduling the Time Needed for the House Clearance

Planning for the time needed for the house clearance ensures that everything flows smoothly. You should consider allocating enough time to clear out a room. A good rule of thumb is allocating about half a day to clear out one room. You can also read the Guidelines of Department of Communities and Local Government for house clearance here.

2. Deciding What to Keep and What to Throw away

Once you’ve figured out the time needed for the house clearance, you now need to decide which items you wish to keep, which you’d rather sell or give away and which will be thrown away. You can implement the traffic light system for the house clearance. This is done by using colored stickers (red for “keep”, orange for “sell/donate”, and green for “bin”). This will be essential when going round the house room after room, labeling everything you see. Try to be as strict as ever. Only use the red stickers for the items that you will definitely need. Once you’ve labeled everything, shift everything around the house so that those with the same colored stickers are grouped in the same place. Always start grouping the green stickered items first as it doesn’t matter if they are damaged when moved around.

how to do house clearance

3. Make an Estimation of all the Stuff you Have for House Clearance

The best way to do this is to think in terms of how much space your stuff would fill. Walk around each room and make a mental note of how much stuff you’d need to carry. Read tips to the disposal of household waste to make the house clearance easier.

4. Arrange for the House to be Cleared

You should now have; Volume of things to keep, Things to donate or sell, Things to the bin. Now look for specialists help. They provide useful information on removal firms, including contacts of which firms operate in your area. Alternatively, you could hire a van and do it yourself. You’ll certainly save some money but it can be such hard work.

Now that you know what to do during a house clearance, what should you collect?

  • Important Documents

Identity theft has become quite rampant, so you should try and protect yourself by treating your confidential documents carefully. If you wish to dispose of credit card receipts or bank documents, consider getting a shredder and destroying the documents. Equally, be careful not to throw out documents you may need later on. This is especially important if you’re undertaking a house clearance for a deceased relative.  Don’t get rid of official-looking paperwork until the estate has been settled.

  • Indoor and Outdoor Furniture
    Indoor and Outdoor Furniture

So, you’re moving to a new place huh? You would still need your furniture for use considering how costly they can be. If clearing a house for a deceased loved one, consider donating to goodwill or selling. You may also keep a piece or two for keepsake.

  • Large and Small Electrical Appliances

It is a no-brainer that electrical appliances for use around the house can be quite costly so it is prudent to set aside the ones you already have.

  • Family Heirlooms and Valuables

You may want to keep the valuable items that have been passed down from generation to generation in your family. These are priceless and worth the hustle.

Everybody is different, so you should keep anything that you feel is important to you no matter how small or insignificant it may seem to people.

For House Clearance Services, You Can Contact Us @ 020 8099 8511

3 Ways to Reduce Household Waste

Ways to reduce the household waste

It is now more crucial than ever to do our bit in environmental conservation. If you want to make a positive change, reducing your household waste is a great place to start. While this abstract idea of reducing one’s waste can be quite overwhelming, the best place to start is at the comfort of your own home and you can read household waste disposal tips here. You can start by making smart purchases to reduce the amount of waste you bring into your house, choosing products with minimal packaging and even having a yard sale to sell off the items you don’t need. Living green, recycling, and composting will lower how much waste you contribute to the environment. Let’s see ways to reduce household waste in this blog post.

3 Ways to Reduce Household Waste

1. Purchase Reusable Items

Instead of purchasing throwaway items like plastic bottles, paper plates and one-time-use batteries, switch to items that can be reused over time. For instance, rechargeable batteries are cheaper than disposable ones and can be used over and over. Investing in a reusable water bottle can be a great idea since most pay for themselves after only a few refills.

Likewise, using a reusable cloth grocery bag instead of the plastic ones can make a big difference in your overall waste output. You should keep a bunch of these bags in your car or right by the door to ensure you don’t forget them when going shopping. Once you start buying only what you need, take it to the next level by storing food properly. You can do this by investing in reusable airtight containers for things like baking ingredients and cereals which can go stale easily.

ways to reduce household waste

2. Learn to Repair Rather than Discard

It can be tempting to just throw out items when they break. However, if you’re trying to reduce waste, try and repair the items instead. For instance, if your shoe tears or the sole comes off, take it to a cobbler instead of discarding it. Likewise, get your broken television repaired as this is way cheaper than buying a new one, unless, of course, it’s damaged beyond repair. While repairing damaged items can be a cost-effective way of managing waste, it is essential to purchasing high-quality items. This is a much better alternative than buying loads of cheap, disposable stuff.

3. Less is More

According to digital entrepreneur and nomad, Fernando Raymond “Adopting a minimalist lifestyle can be a great way to manage different types of waste clearance”. Some of the products we buy nowadays have excessive packaging. Some may have two or three layers of packaging. Identify brands that use less packaging. Also, consider buying from bulk bins. With these bins, you simply scoop out the food into a bag, hence producing less waste than the standard bag.

In this consumerist society, we often feel the need to buy a lot. Next time you want to buy something, ask yourself “Do I really need this?” It is prudent to only purchase the essential items that you can’t do without. Take fewer trips to the mall or store and consider re-purposing items you already own to fill that need.

Less is MoreConsider donating old items that you don’t need anymore. You can donate clothes, furniture, and household items to a thrift store. Magazines and old books, to the libraries or schools. If you cannot just give those items away, hold a yard sale. You can make a little cash and clean out your house clearance at the same time!
Unless you live a zero-waste lifestyle, there is always room for improvement when it comes to taking care of the environment. There are plenty of little things you can do to massively reduce the amount of waste you produce.

CALL ME
+
Call me!