Clicky

Waste Carrier Registration CBDU408337

“Resource Farming” at Home: Transforming Everyday Rubbish into Valuable Materials

Transforming Everyday Rubbish into Valuable Materials

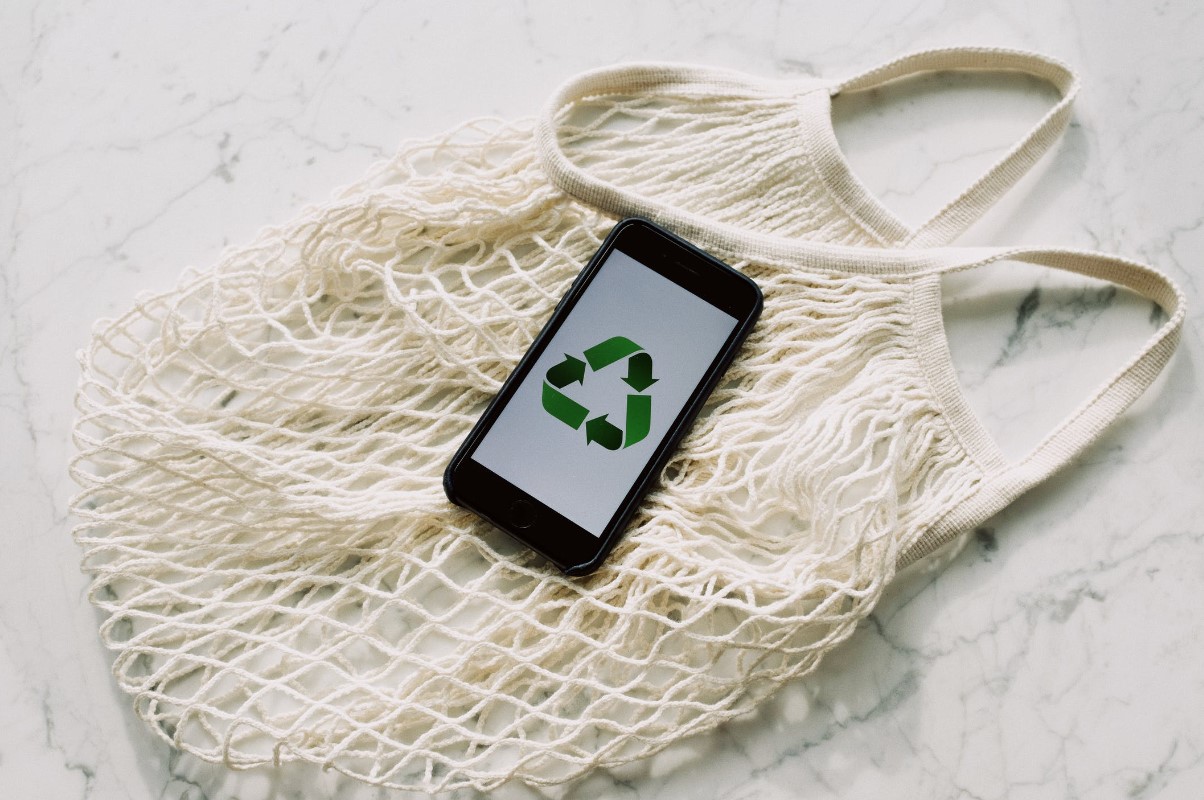
What if you could produce new, useful items from the same waste you toss out every day—coffee grounds, plastic bottles, cardboard boxes, and more? That’s the concept behind “resource farming” at home: treating your rubbish as raw materials for small-scale “factories.” By repurposing everyday items that might otherwise end up in landfill, you can save money, reduce waste, and even discover a new hobby. Below, we’ll explore what resource farming is, the types of items you can harvest, and how to set up a functional, beginner-friendly system in your own home.

1. Understanding Resource Farming

Resource farming is the idea that you can harvest raw materials from items you typically throw away. Rather than letting valuable resources disappear into landfills, you bring them back into a circular economy—one that reuses, recycles, and repurposes. By looking at rubbish not as “trash” but as something brimming with potential, you can create:

  • Compost for your garden from kitchen scraps.
  • DIY crafts and household products from used plastics or paper.
  • Bio-based materials for small manufacturing projects.

The guiding philosophy is that small changes at home can lead to a big impact. When you adopt resource farming, you help reduce the need for newly mined or manufactured resources. Plus, you get to experiment and have fun seeing what you can create from your would-be trash.

2. Why Resource Farming Matters

We live in a world where single-use plastic, excessive packaging, and unsustainable consumption are the norm. Even if you’re dedicated to recycling, not all items are handled properly in large-scale waste systems. Some materials are too costly or complex to process, which means they still end up at the landfill. But when you take control of your own rubbish, you cut out the middle steps, ensuring a higher likelihood that these materials get reused effectively.

Resource farming also fosters a creative mindset. Each time you’re about to throw something away, you’ll start asking, Could I do something with this? Over time, that approach can lead to a more thoughtful, sustainable lifestyle that benefits both your wallet and the planet.

3. Everyday Materials to Harvest

Your home is likely filled with potential resources waiting to be reimagined. Here are some of the most common and versatile:

  1. Coffee Grounds
    • Rich in nitrogen and useful for compost or even certain skincare scrubs.
    • Mix with dried herbs to make natural fertilizer for your garden.
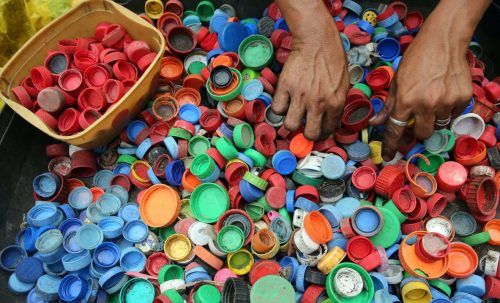
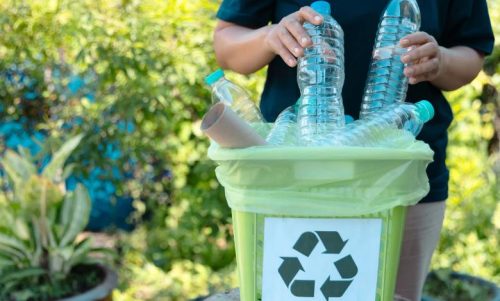
  1. Plastic Bottles and Jugs
    • Commonly turned into planters, bird feeders, or storage containers.
    • Can be cut into strips and melted down for 3D printing filament (with the right equipment).
  1. Cardboard and Paper
    • Shredded cardboard can be used as mulch or compost brown material.
    • Clean, sturdier cardboard can be turned into organizers, shelves, or custom packaging.
  1. Glass Jars and Bottles
    • Ideal for food storage, homemade jams, or DIY terrariums.
    • Can be painted, etched, or decorated for a personalized touch.
  1. Metal Cans
    • Easily upcycled into pencil holders, lanterns, or small planters.
    • Larger cans can serve as makeshift tool caddies or even cooking accessories (for camping stoves).
  1. Textiles (Old Clothes, Fabric Scraps)
    • Can be turned into cleaning rags, patchwork quilts, or repurposed fashion items.
    • Certain fabrics can be shredded to make stuffing for pillows or pet beds.

By focusing on these commonly discarded materials, you’ll quickly see how much potential is hidden in items that usually head straight for the bin.

4. Setting Up Your Home “Factory”

Think of your home (or apartment) as a mini-production facility for reclaiming and repurposing materials. You don’t need a dedicated workshop or specialized equipment to get started, though a few essentials can make the process smoother:

  1. Sorting Bins
    • Have separate containers for different materials (paper, plastic, glass, compostable scraps).
    • Keep them in a convenient location—perhaps under the sink or in a pantry—so you’ll be more likely to use them consistently.
  1. Basic Tools
    • Scissors, box cutters, a hot glue gun, and perhaps a small drill.
    • For more advanced projects (like melting plastic), you might eventually invest in a heat gun or 3D printer.
  1. Workspace
    • A small corner in your garage, spare room, or even your balcony can suffice.
    • Ensure there’s proper ventilation if you plan on working with adhesives, paints, or any heat-based processes.
  1. Safety Equipment
    • Gloves, goggles, and a mask if you’re cutting or melting materials.
    • Keep a first-aid kit nearby—accidents happen, and it’s best to be prepared.

Setting up these basics ensures you’ll have the infrastructure to handle, store, and transform your waste consistently, without it piling up and becoming unmanageable.

5. Easy DIY Projects to Try

If you’re new to resource farming, start with simple, fun projects. The goal is to see how everyday rubbish can be given a second life in a straightforward way.

A) Coffee Ground Scrub

What You Need:

  • Used coffee grounds (dry them first)
  • Coconut oil or olive oil
  • A jar or small container

Steps:

  1. Mix Ingredients: Combine the coffee grounds with just enough oil to create a paste-like consistency.
  2. Optional Add-Ins: For scent, add a drop or two of essential oils like lavender or peppermint.
  3. Store: Keep the mixture in a sealed container. Use it as an exfoliating scrub during showers or to remove tough smells from your hands (like garlic or onions).

Result: A natural, homemade exfoliant that costs almost nothing and keeps those coffee grounds out of the landfill.

B) Plastic Bottle Planter

What You Need:

  • A clean plastic bottle
  • Scissors or a box cutter
  • Potting mix and a small plant or seeds

Steps:

  1. Cut Bottle: Make an opening in the side or cut it in half horizontally, depending on your preferred style.
  2. Create Drainage: Poke a few holes in the bottom for excess water to escape.
  3. Fill & Plant: Add potting mix, place your seeds or seedling, and water.
  4. Decorate (Optional): Paint or label the bottle if you want a decorative touch.

Result: A DIY planter that helps you grow herbs, small flowers, or succulents on your windowsill.

C) Cardboard Organizer

What You Need:

  • Sturdy cardboard (like from shipping boxes)
  • A ruler and pencil
  • Glue or tape

Steps:

  1. Measure & Cut: Sketch out the dimensions for compartments—like a small desk organizer for pens, sticky notes, or mail.
  2. Assemble: Fold the cardboard along your lines, then glue or tape them together to form the compartments.
  3. Reinforce: If you need extra strength, layer multiple pieces of cardboard.
  4. Customize: Paint, label, or add decorative paper to enhance the look.

Result: A practical organizer for your desk or kitchen counter, crafted entirely from waste material.

6. Taking It to the Next Level

If you find yourself loving the idea of resource farming, you can explore more advanced projects that require specialized tools or know-how.

  • Turning Plastics into 3D Printer Filament: With a simple DIY extruder, you can shred plastic bottles or containers and convert them into filament for 3D printing. This allows you to create everything from custom phone cases to jewelry, all from recycled plastic.
  • Paper Recycling at Home: Using a blender, water, and a deckle (a simple wooden frame with mesh), you can turn scrap paper into handmade paper sheets for art, stationary, or gift tags.
  • Wood Scrap Upcycling: If you have access to small wood scraps (from old pallets or broken furniture), you can craft shelves, birdhouses, or rustic décor items.

These ventures might require an investment in equipment and time, but the payoff is truly personalized items, along with the satisfaction of knowing you’re a small-scale recycler and manufacturer.

7. The Social and Environmental Impact

Engaging in resource farming has benefits that go beyond your immediate home. When neighbors, friends, or community members see what you’re doing, they might be inspired to adopt similar practices. Imagine if an entire street or apartment complex started turning their coffee grounds into compost, or if a local school launched a project to convert plastic bottles into art supplies. Collective efforts can significantly reduce the volume of waste sent to landfills.

Moreover, becoming a resource farmer often leads to mindful consumption. Once you realize that many of the items you buy could have a second or third life, you become more selective about bringing new things into your home. This shift in mindset is a key ingredient in cultivating a sustainable lifestyle—one that values creativity, conservation, and continuous learning.

8. Troubleshooting and Tips for Success

Resource farming is not without its obstacles. Here are some common issues and how to address them:

  1. Overwhelm with Clutter: If you start saving too many items without a plan, your home can quickly become a mess. Solution: Set a limit. Only store what you can realistically process within a given week or month.
  2. Inconsistent Motivation: Enthusiasm might dip if you don’t see immediate results. Solution: Start small. Focus on one or two projects at a time, and celebrate small victories—like successfully upcycling a week’s worth of coffee grounds.
  3. Quality Control: Homemade products might not always look or function like store-bought versions. Solution: Embrace experimentation. With practice, you’ll refine your methods and possibly discover something better than what you’d buy at a store.

Remember, resource farming is a journey. It’s about gradual improvement, having fun, and connecting with the materials you use daily.

9. Conclusion: Turning Waste into Possibility

Resource farming at home offers an exciting new way to reshape our relationship with rubbish. By harvesting and transforming everyday materials—coffee grounds, plastic bottles, cardboard, metal cans—you reduce waste, save money, and spark creativity. It’s an activity that can grow with you, from basic DIY crafts to more advanced projects requiring specialized tools. Along the way, you’ll learn about materials science, economics, and even a bit about sustainable design.

Most importantly, resource farming makes you part of the solution to our growing waste crisis. Instead of seeing trash as a burden, you’ll view it as raw potential. And when you take that mindset into your broader life—whether it’s choosing eco-friendly products or inspiring neighbors to upcycle—your small-scale efforts can multiply into a community-wide movement. So why not give it a try? Grab a few items destined for the bin, roll up your sleeves, and see what you can create in your very own at-home “factory.” Each project, no matter how small, is a step toward a more sustainable and resourceful future.

Japanese Knotweed- What It Is And How To Deal With It?

Japanese Knotweed

What is Japanese knotweed?
Japanese knotweed is a fast-growing, bamboo-like plant originally found in Japan, China, and Taiwan. It was introduced to the UK in the early 19th century because people admired its attractive appearance—gardeners loved how quickly and densely it grew. However, once it spread, it soon became clear that Japanese knotweed was invasive and destructive. These days, it’s widespread across the UK, particularly in London, South Wales, and the South West.

In the UK, Japanese knotweed can grow up between 15cm and 20cm a day. Its roots can burrow down three metres and sprawl out as far as seven metres horizontally. Not only does this make it difficult for other plants to grow, but it can also break through stone, brick, and even some metals.

What does Japanese knotweed look like?
To deal with Japanese knotweed, you first need to know how to spot it. Its leaves are often described as heart-shaped or shovel-shaped, but one reason it’s tricky to identify is that it changes with the seasons:

  • Winter: The plant lies dormant, and its stems turn dark brown.
  • Spring: The leaves start getting green and shoots are slowly becoming purple. Around April, the new “asparagus-like” shoots appear, and they can grow a couple of centimetres a day.
  • Summer: This is when knotweed really takes off—mature plants can grow up to 20cm a day. The leaves becoming larger and the steams are similar to bamboo ones, with small purple specks. By late summer, you might see small cream-coloured flowers.
  • Autumn: As temperatures cool, the leaves turn yellow and start to wilt.

If left unchecked, Japanese knotweed can reach up to three metres tall—so size is another major clue.

Why can Japanese knotweed cause to your property?
Knotweed has a reputation for causing serious structural damage. While it can’t literally pierce solid concrete on its own, it takes advantage of tiny cracks and weaknesses, pushing its way in and making gaps bigger as it grows. That’s how it can end up damaging everything from paving stones and tarmac to retaining walls, foundations, and underground pipes.

Aside from causing expensive damage, Japanese knotweed can drastically lower your property’s value. In a notable case featured on the BBC’s The One Show, a couple in Hertfordshire lost £250,000 on their family home due to knotweed issues.

Knotweed removal and disposal is a difficult and costly operation. We at All Junk Removal recently did big house clearance project just outside London. We discovered Japanese knotweed by chance, while doing the job. We had some experience before, dealing with these plans and here is our advice what to do, once discovered: 

Freshly cut stems and roots must be handled like hazardous material to prevent them from taking hold elsewhere, further commented Stan. Meanwhile, chemical treatments can be time-consuming and require repeated applications, since the roots can lie dormant underground. Digging out every scrap of knotweed in your garden or allotment is like embarking on a minor archaeological excavation – you must unearth every last snippet of root to prevent a new invasion.

If you’re in the process of buying a home that has Japanese knotweed, be aware that some mortgage lenders might turn you down until the issue has been treated or controlled. That’s why it’s so important to spot Japanese knotweed early and take steps to get rid of it before it becomes a major (and costly) problem.

Carpet Removal Cost in London- Everything You Need to Know

Carpet removal process with professional removal company

Useful Information About Carpet Removal Process- Cost Considerations Before Removing Your Old Carpet

If you’re looking to upgrade your flooring, one of the first steps is removing your old carpet. Whether you’ve got a well-trodden carpet, a decorative rug that’s outlived its style, or underlay that’s seen better days, efficient carpet removal is an important task. In this comprehensive blog post, we’ll walk you through the cost of carpet removal (starting from £6 per m²), outline the best step-by-step process, and share useful tips on carpet disposal and recycling. We’ll also discuss why hiring a qualified professional can often be the best route for many homeowners. Let’s dive in!

1. Why Remove Your Old Carpet?

  1. Aesthetic Upgrade
    Over time, colors fade, patterns go out of style, and stains build up. Removing an old carpet can instantly modernize your space.
  2. Health Reasons
    Carpets can harbor dust, allergens, and even mildew, affecting indoor air quality.
  3. New Floor Installation
    If you plan to install hardwood, laminate, vinyl, or fresh carpeting, the old flooring must go.
  4. Sudden Flooding or Water Damage
    Accidents happen—whether it’s a burst pipe, an appliance leak, or a natural flood. A wet carpet can become a breeding ground for mold and mildew if not removed promptly. Urgent removal is crucial to prevent permanent damage to the subfloor and potential health hazards. In these high-stress situations, professional help can make the process faster, safer, and far less overwhelming.

2. Understanding Carpet Removal Costs

Pricing Basics

  • Prices start from £6 per m²: This is a ballpark figure and can go up depending on factors like the condition of the carpet, size of the space, and complexities (e.g., heavily glued carpets or multiple layers of underlay).
  • Size and Complexity: Larger areas or rooms with lots of nooks and crannies may add to the cost.
  • Additional Services: Removal of carpets, rugs, underlay, tack boards, and adhesives can increase the price if they require extra labor and time.

Factors That Affect Pricing

  1. Carpet Condition: Worn, wet, or heavily stained carpets can be more cumbersome to remove, especially if moisture has seeped into the underlay.
  2. Type of Underlay and Boards: Some underlays are stapled or glued to the subfloor or boards, requiring specialized tools or extra time to remove.
  3. Accessibility: If your home has lots of narrow staircases, or if furniture must be moved, labor costs may rise.
  4. Disposal Fees: Transporting and disposing of the old carpet, rug, and underlay can incur additional expenses, especially if you aim to recycle certain materials.

By discussing these variables with professionals or comparing quotes, you can get a clearer sense of your total budget.

3. The Best Step-by-Step Carpet Removal Process, Should You Consider DIY

With proper preparation and the right techniques, you can save time, effort, and money.

Step 1: Preparation

  • Clear the Area: Remove all furniture, breakable items, and décor. A clear space ensures you won’t have to stop mid-removal to move belongings around.
  • Safety First: Gather personal protective equipment (PPE) like gloves, dust masks, and knee pads. Carpets collect dust and allergens that can become airborne once you start pulling them up.

Step 2: Identify Fastening Points

  • Remove Baseboards or Threshold Strips: In some cases, you’ll need to gently pry these up. If you plan to reuse the baseboards, remove them carefully to avoid damage.
  • Check for Tack Strips (Gripper Rods): These are typically located around the perimeter of the room. They hold the carpet in place.

Step 3: Cutting the Carpet

  • Cut into Manageable Strips: Use a utility knife to cut the carpet into 3- to 4-foot strips. Smaller strips are easier to handle, roll, and transport.
  • Roll and Secure: As you peel back each section, roll it up tightly and secure it with tape to keep everything neat.

Step 4: Removing the Underlay

  • Peel Away Carefully: Depending on the type of underlay, it might be stapled or glued to the subfloor or boards. Remove it gently to prevent damage to the subfloor.
  • Check for Additional Layers: Sometimes, older floors might have more than one layer of underlay. This can increase removal time.

Step 5: Tack Strips & Staples

  • Remove Tack Strips (Gripper Rods): Use a pry bar or similar tool. Be mindful of sharp nails or tacks.
  • Pull Out Staples: A sturdy pair of pliers or a specialized staple-remover tool helps you extract leftover staples or nails.

Step 6: Inspect the Subfloor or Boards

  • Ensure It’s Level and Secure: Look for signs of rot, damage, or uneven boards. Repair or replace any damaged areas.
  • Clean Thoroughly: Sweep or vacuum the subfloor to remove debris, dust, and any stray staples or nails.

Step 7: Disposal & Recycling

Now that your carpet, rug, underlay, and boards are removed, it’s time to think about disposal. You could:

  • Hire a Professional Disposal Service: If you’re short on time or the volume is large, let a professional handle the disposal.
  • Take It to a Recycling Center: Some recycling centers accept carpets and underlays, ensuring materials don’t end up in a landfill unnecessarily.
  • Check Local Council Options: Many local councils in the UK offer collection or provide information on recycling facilities that handle carpets.

4. Why Consider Professional Carpet Removal Services?

While a small room of carpet might seem easy enough to remove on your own—and you might be able to transport the old carpet to a recycling or disposal site using your personal car—larger jobs and urgent situations (such as sudden flooding) quickly become more complicated. Here’s where qualified carpet removal companies step in:

  1. Expertise & Efficiency
    • Professionals have the tools, training, and hands-on experience to remove carpets, rugs, underlay, and boards quickly and safely.
    • They know how to handle tricky spots (like glued-down underlay or awkward corners) without damaging the subfloor.
  1. Convenient Disposal
    • Disposing of leftover carpet and underlay is one of the biggest headaches for DIY projects. Small quantities can fit in a car, but if you’re tackling multiple rooms or a large area, you’ll likely need a van or special arrangements.
    • Carpet removal companies often include disposal or recycling fees in their total price. This can be more cost-effective than hiring a separate service or renting a vehicle to haul away large volumes of material.
  1. Time & Effort Savings
    • DIY removal can be a lengthy process, particularly if you run into unexpected issues like stubborn gripper rods or multiple layers of underlay.
    • Professionals can minimize disruption to your home life and complete the job in a fraction of the time it might take a novice.
  1. Handling Emergencies (Flooding or Water Damage)
    • When your carpet is drenched due to flooding or a burst pipe, time is of the essence to prevent mold and further property damage.
    • Professionals can handle urgent removals swiftly, ensuring the subfloor is dried properly and any compromised materials are disposed of or recycled. Their experience prevents potentially costly mistakes or oversights.
  1. Cost Benefits
    • While there is a fee for professional carpet removal, some companies don’t charge much for this service and even bundle it into the overall package if you’re having new flooring installed.
    • This integrated pricing can save you money on disposal costs, tool rental, and the potential for damage or errors if you go the DIY route.

5. Carpet Disposal and Recycling

Sustainability is increasingly important. Recycling or responsibly disposing of old carpet reduces environmental impact and keeps unnecessary waste out of landfills. Here are a few ways to handle it:

  1. Carpet Recycling Centers
    Some specialized facilities convert used carpet fibers into new products like insulation or plastic pellets.
  2. Charitable Donations
    If the carpet or rug is still in decent condition, certain charities or re-use organizations might accept it.
  3. Upcycling Projects
    Cut portions of carpet can be repurposed into car mats, pet beds, or protective mats for gardening.

6. Tips for a Smooth Carpet Removal Experience

  • Get Multiple Quotes: Since prices can start at £6 per m² but vary based on complexity, compare a few options to find the best value for money.
  • Plan Ahead: Schedule carpet removal when you can dedicate time to the task. Rushing can lead to injuries or mistakes.
  • Check for Hidden Surprises: Sometimes you might find old floorboards, layers of underlay, or damage that needs attention. Budget a little extra for unexpected repairs.
  • Communicate with Installers: If you’re hiring a separate company for new floor installation, coordinate timing and expectations to avoid delays.

7. Final Thoughts

Carpet removal might seem like a straightforward DIY project—especially for a small room—but when you factor in disposal, transportation, flooding emergencies, and potential surprises, bringing in a qualified professional can be a smart and cost-effective choice. They handle the heavy lifting, ensure efficient disposal or recycling, and often include these services as part of the overall flooring package. With a starting cost of around £6 per m², it’s an investment in your home’s appearance, health, and long-term value.

What are the Benefits of Recycling for the Environment?

What are the Benefits of Recycling for the Environment

Recycling is a great way to reduce the amount of waste that ends up in landfills while also reducing pollution in the environment. By recycling materials, you’re not only reducing the amount of waste that’s created, but you’re also reducing the amount of energy and resources needed to create new materials from scratch. In addition, recycling helps preserve natural resources and protect our environment. So why not give it a try? You may be surprised at the benefits of recycling for the environment.

What is recycling?

There are many reasons to recycle. By properly breaking down waste materials, you can help make a difference for our planet. Not to mention, recycling helps protect the environment from pollutants and toxins released during industrial processes. Not to mention, waste recycling is also good for the environment because it reduces the amount of waste that needs to be processed. So make recycling a part of your everyday routine and help protect our planet for future generations!

Why recycle?

What is recycling

There are many benefits to recycling, and it’s a great way to help protect the environment! Not to mention, recycling is good for your wallet too! By reducing the amount of waste that’s sent to landfills, recycling helps improve air quality and reduce emissions from factories. In addition, recycling helps reduce the amount of materials that need to be produced in the first place. All of these reasons make recycling a smart decision for everyone, no matter their level of involvement. So go ahead and recycle! You won’t regret it!

What are the materials recycled into?

Recycling is a great way to help the environment and save money at the same time. By recycling materials, you can create new products and materials from recycled materials, which saves energy and resources. In addition, recycling programs can help reduce the amount of waste that’s produced in the first place. So, why not recycle materials like plastic, paper, aluminum cans, and more? It’s a great way to help the environment, save money, and reduce your carbon footprint!

The benefits of recycling for the environment

benefits of recycling for the environment
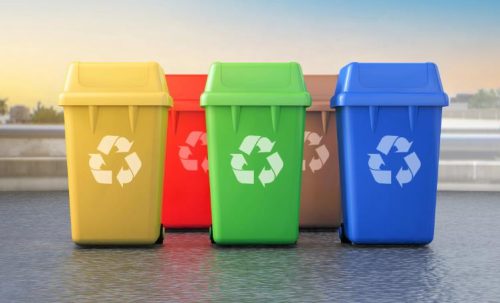
There are many benefits to recycling for the environment. By reducing the amount of waste produced, we are helping preserve our planet for future generations. Not to mention, recycling helps reduce the amount of energy that is needed to create new materials from scratch. In addition to these benefits, recycling also generates economic benefits. It creates jobs, generates revenue for the government, and increases the value of materials. If you’re thinking of adding recycling to your daily routine, there are many reasons why it’s a good idea!

Conclusion

Recycling is one of the most important things you can do to help preserve the environment. By recycling materials into new products, you’re reducing the amount of waste that ends up in landfills. Not to mention, recycling helps create jobs and supports local businesses. So, what are you waiting for? Start recycling today!

How Organic Waste can be Recycled with Biodegradable Bin Bags?

Waste Recycle with Biodegradable Bin Bags

How Organic Waste can be Recycled with Biodegradable Bin Bags?

Biowaste is usually placed in biodegradable bin bags ready for rubbish collection in green bins. It is recycled in two different ways after collection:

  • Either in a composting plant, where it rots into humus, or
  • In a biogas plant, where the waste first ferments and biogas is obtained. The rest, which has not become gas, is composted into humus.

In composting plants, the first step is to free the organic waste as much as possible from impurities. Iron parts are removed with a magnet and as many plastic parts and large objects as possible with various screens and grippers.

The biodegradable bin bags will be part of the composting process as they rot along with the organic waste.

However, impurities, such as small plastic parts, can usually not be sorted out and every household should try to add plastic or any other non-organic rubbish to their specialist junk collection.

How Organic Waste can be Recycled with Biodegradable Bin Bags
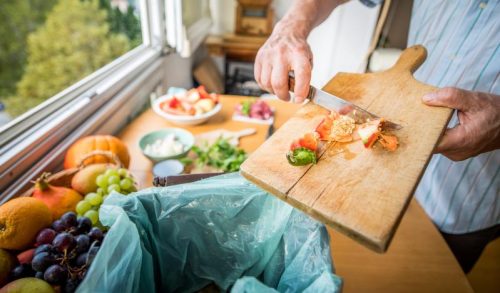
The pre-cleaned organic waste is then heaped up into large compost piles and, if necessary, mixed with other organic waste such as green waste in order to obtain structurally rich compost.

In biogas plants, the organic waste is also freed as much as possible from impurities and – mixed with another biowaste – filled into an airtight chamber.

Bacteria lead to fermentation processes, in the end mainly methane is produced. The gas is purified and can then either be fed into the natural gas grid or burned to generate electricity and heat in a combined heat and power plant.

Once all fermentable substances have been converted, the so-called digestate can be removed, composted, and used as humus fertilizer. Fermentation to biogas is technically more complex but represents better utilization because “green” energy is obtained.

Compostable Plastic should not be put in the Biodegradable Bin Bags

Contaminants are a problem in the organic bins and in the recycling of waste. Plastic materials are particularly common in the bin: plastic bags that were used to dispose of organic waste or packaging of food that has ended up in the organic bin together with its contents.

Plastic material, whether designated as compostable or not, should not end up in the organic bins. Conventional plastics do not rot or rot too slowly and, like microplastics, can endanger us or other living beings. Compostable plastics sometimes decompose only very slowly. They should only be in the organic bin if the municipality allows them.

It is therefore recommended to try and reuse any household waste as much as possible. But if it needs to be disposed of, it should go into the recycling bin rather than the organic bin.

Organic waste recycled

Self-composting – an Alternative to Biodegradable Bin Bags and Organic Waste Collection

If you want to compost yourself to cut down on spending on biodegradable bin bags, you should pay attention to a few things:

  • Structurally rich organic waste such as tree pruning, shrub, and hedge pruning, perennials, reeds, rushes, and straw should be crushed before composting if possible so that they rot faster. In particular, “acidic” and tannin-containing conifers can become a problem if they are too large.
  • Low-structural compostable materials are kitchen waste such as vegetable and fruit residues, potato peels, tea residues, coffee grounds, and crushed eggshells. They are easy to compost. Garden waste such as lawn clippings, wild herbs, flowers, and foliage are also suitable. These substances are particularly nitrogenous and, together with the carbon-containing structure-rich materials, provide the ideal “food” for the microorganisms in the compost.
  • Unsuitable are
    • color-printed paper
    • Food cartons made of composite materials
    • Wastepaper and cardboard in larger quantities
    • Dog and cat litter
    • Street garbage, vacuum cleaner bag contents, and ashes
    • Cooked or moldy food residues, meat, and fish waste can basically be composted. However, there is a risk that rats and pests will be attracted.

The compost can be used as a natural fertiliser or soil conditioner for garden plants, lawns, trees, and shrubs, but also for balcony plants and at the same time acts as a DIY upgrade for your outdoor space. Depending on the degree of ripeness, it is suitable for different plant species. Composting only makes sense if there is enough land for the finished compost to be fertilized.

So, always ensure you use biodegradable bin bags for your organic waste if you’re not composting and avoid adding any plastic or other rubbish that is not meant to go in it as it will affect the rubbish processing negatively.

Reasons Why McDonald’s Chooses All Junk Removal

Fast-food-chains-like-McDonalds-hire-junk-removal-services-for-building-waste-removal

You may have noticed that All Junk Removal have worked with huge brands in London like popular fast food restaurants McDonalds and Pizza Hut as well as top take away coffee shop Pret a Manger.

Big companies like these require different kinds of rubbish removal services that support them with managing all the waste they produce on a regular basis. Find out why they opted for All Junk Removal.

Reasons Why McDonald’s Chooses All Junk Removal

What’s the Waste Situation in the UK’s Hospitality Sector?

In the UK the biggest waste proportion is produced by construction as you can see in the below graph, showing data released by the UK Government Department of Environment, Food & Rural Affairs in March 2020:

UK-waste-distribution-in-different-waste-categories-in2016

According to this report, mineral wastes, which are basically construction wastes such as bricks and stone, which are converted into usable aggregates, meaning they are reused, make up the highest percentage of overall waste generation every year. This is important to know as this waste category produces the largest amount with over one third (£36.7%) compared to other wastes restaurants produce such as plastic wastes (0.7%) and paper & cardboard wastes ((3.2%) or vegetal aka food wastes (2.7%).

Are you surprised? Most people assume that the biggest waste production is plastic waste or food waste, but the official statistics paint a different picture, which isn’t often portrayed in the media. If you compare nearly 80 million tonnes per year of mineral wastes with 2.87 million tonnes of food, packaging and other ‘non-food’ waste, of which 46% is recycled according to charity WRAP, then we can clearly see the true culprit of pollution.

Construction Waste Clearance plays a Key Role in Reducing and Recycling Waste

No wonder that even huge businesses like McDonalds and Co. require help with their construction and building waste.

According to market research firm MCA Insight, the fast food industry has doubled in growth over the past three years and is expected to be worth £9.8bn by 2021. With more delivery options for fast food and apps like Deliveroo and Just Eat, people are especially keen on ordering food online during the pandemic while popular London restaurants are closed during lockdowns.

This means more fast food restaurants are popping up or moving around all over London, requiring building waste removal services to manage their mineral, building and office waste in London according to government regulation.

Construction Waste Clearance plays a Key Role in Reducing and Recycling Waste
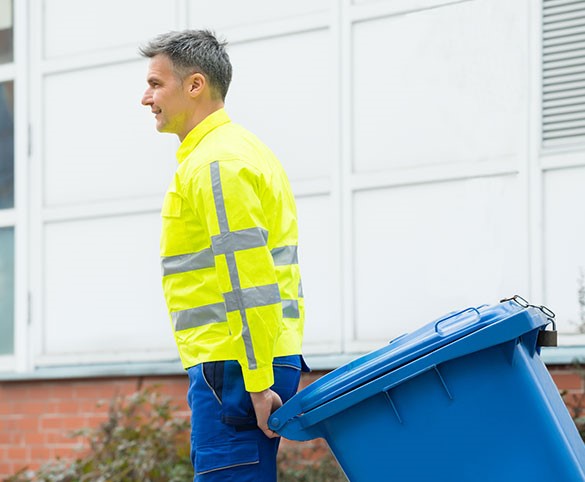
All Junk Removal were hired by McDonalds, Pizza Hut and Pret A Manger to remove any debris left after renovation or repair works in their restaurants. The building clearance expert team collected all the waste and disposed of it responsibly.

This solution is much more efficient compared to hiring a skip for example. First of all, none of the staff in food restaurants are legally allowed to place heavy duty items like bricks into skips due to the injury risks. Secondly, it is very time-consuming to clear the building waste and put it into the skip, especially as not everything can go into the skip according to the collection restrictions.

The All Junk Removal’s London waste clearance team will get rid of all the bits of concrete, bricks, off-cut bits of wood, tiles, stones and rocks and even the heaped up soil in one booked session, which saves everyone time while also being cheaper than hiring a skip. And most importantly, it’s more environmentally responsible as the hired team will sort the building site rubbish to ensure items that can be recycled or reused such as wood, will be taken to appropriate distribution bases, located in East London, just outside the M25 near Grays in Essex.

Top Rubbish Removal Services The Big Brands Trust

All Junk Removal London are very proud to be working with companies like McDonalds and Pizza Hut, because they care about the waste situation in London and want to make a valuable contribution by supporting the big players in the hospitality sector.

All Junk Removal follow the principles of the 3 Rs, keeping track of what can be reused and what can be recycled. With every waste collection they’ll sort out the material that’s suitable for reusing, upcycling or recycling or that can be donated to charities, if in good condition like furniture for example. Only as a last resort will something be sent to one of London’s many waste or energy plants.

It is reassuring to know that everyone plays their part in saving this planet from increasing pollution levels through eco-friendly rubbish removal methods. So it is clear to see what the reasons and benefits of professional junk removal services in London are.

10 Creative DIY Plastic Waste Recycling Methods

Plastic Waste Recycling Methods

Plastic contamination has become such a grave issue. The seas and oceans have been flooded with so much plastic waste. This has, in turn, led to declining sea life. This, despite the fact that plastic bottles wind up in just about every aspect of our daily lives. It is the responsibility of the house owner and landlord to maintain waste cleanliness. The examples are numerous. From water bottles to laundry detergents and even condiment bottles. It is a real shame that so much plastic ends up in landfills when its durability makes it the perfect material for numerous recycling projects. Reusing and recycling plastic bottles is crucial for the health of the planet. So what can you do? Let’s see plastic waste recycling methods in this blog post.

10 Creative DIY Plastic Waste Recycling Methods

1. DIY Plastic Bottle Planter

Spark your Do It Yourself spirit with a simple project that turns a 2-liter bottle into a useful and appealing indoor planter. Below are some simple step by step instructions on how to create one;

  • Get a 2-liter bottle and cut the bottom third off.
  • Paint the bottle with the color of your choice.
  • Fill the bottle with soil and seeds then water and wait for germination!

Plastic Waste Recycling Methods

2. Create a Piggy Bank from a Reused Plastic Bottle

Create a plastic bottle piggy bank and start saving money. You can paint the whole bottle so that the amount inside will be a surprise. You can also leave it transparent so that you can track your saving progress. Simply put, this is a project that makes a lot of cents!

3. Up-cycle a Plastic Bottle into a Watering Can

Why pay for a watering can when you can easily make one from a plastic bottle? Drill or punch some holes in the cap and you’ve got yourself a new watering can.

4. Reuse Plastic Containers for Snack Storage

If you’re looking for a sustainable way to organize your kitchen, consider repurposing old bottles into snack containers to save space. For instance, you can reuse coffee creamers instead of disposing of them.

5. Turn Plastic Bottles into a Trash Can

There’s no better way to going green than creating a trash can out of waste recycling plastic bottles. Collect enough plastic bottles then embark on this project.

6. Create a Vertical Garden from Reused Soda Bottles

Create a Vertical Garden from Reused Soda Bottles
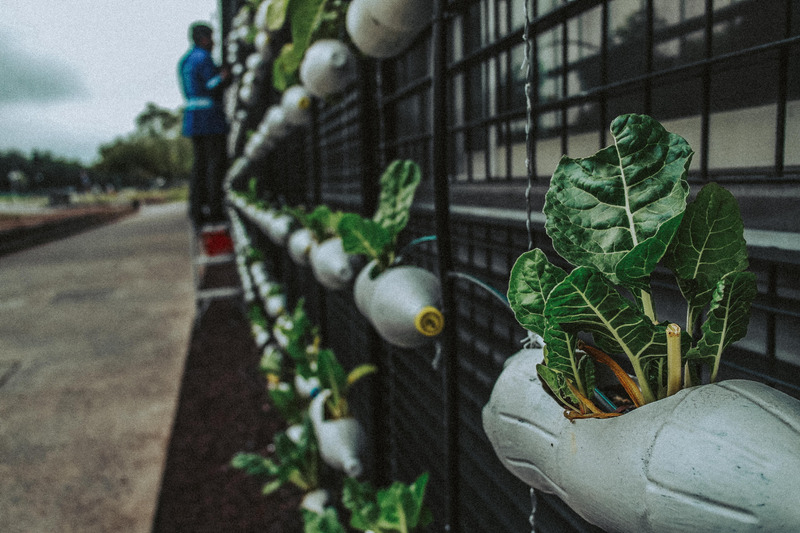
Need a simple yet low-budget way to beautify your yard? Well, you should start drinking up. Soda bottles can be very useful in this project. You will also need twine or clothesline to tie them up vertically on your wall.

7. Reuse Plastic Bottles to Make a DIY Sprinkler

Want greener pastures? You can literally ensure that your yard or lawn remains lush and green in all seasons. Simply poke holes in a 2-liter bottle and voila! Your own easy DIY sprinkler!

8. Make a Beach Bucket Using Laundry Detergent Containers

Remember to stash that empty detergent container for an upcoming DIY project. You can cut it up into a beach bucket hence saving you money instead of buying one.

9. Recycle Empty 2-Liter Bottles into DIY Water Filters

Ever been stuck far from civilization with no source of clean water? Oh, maybe not? Well, you still need to filter your water and you don’t need to spend so much for a good filtration system. You can embark on a project to create one from any plastic bottle.

10. Make Toys From Empty Plastic Bottles

You shouldn’t forget about the children. Keep them entertained using various toys made from recycled plastic shampoo bottles. You can complete this project by creatively painting the outside of the bottle and even adding fun elements depending on the child’s needs or personality.

Make Toys From Empty Plastic Bottles
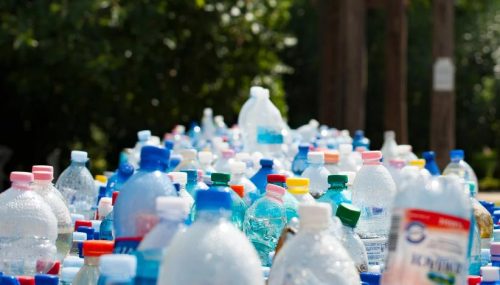
While you should be free to explore your creativity, it’s likely you may not be able to utilize all the recycled plastic bottles. Make sure you have a plan to recycle those that you will not use and create zero waste in your home. Set up sorting bins to make it easy for everyone to recycle the bottles.

CALL ME
+
Call me!